


Install and Start Using PicoScope in Demo Mode
Instructions...
You should be able to install it without uninstalling the latest software. It will install to: C:\Program Files (x86)\Pico Technology\PicoScope 7 Automotive Stable\ Create a desktop shortcut to PicoScope.exe in that folder so that you can access it easily.A new Demo Mode Course has been created.
Install and Start Using PicoScope 7
As described previously, you need the old version of PicoScope 7 for this tutorial. Download it from the box on the right.
Landscape View
You cannot run PicoScope 7 on a cell phone. We recommend using the desktop PC to view this course, but if you do want to use a cell phone, landscape view might be easier to read.
PicoScope 7 — The Basics
Watch this overview of PicoScope 7 software first, for a comprehensive introduction to the software.
In this video, we embark on an exciting journey into the world of automotive diagnostics with PicoScope 7 Automotive. Join Ben as he guides you step-by-step through the entire process, from the initial software download to capturing your first measurement. We'll cover everything you need to know to get started, including installation tips, navigating the user interface, and understanding basic measurement techniques.
Whether you're a seasoned technician or just starting your automotive diagnostic journey, this video will equip you with the knowledge and confidence to harness the power of PicoScope 7 and unlock valuable insights into vehicle performance.
Running Time 45 min 24 sec
Installing Picoscope 7 for this course
Install PicoScope 7 Stable Version.
- Download PicoScope 7 Stable Version (use the link above, right for this course)
- The following programme/s will have been added to your system:
- PicoScope 7 Automotive — which is installed on Windows, Mac and Linux systems. This is the Automotive Oscilloscope Software, which includes the Demo Mode which we will examine in this tutorial; and
- PicoDiagnostics — which is not used in this tutorial. It includes specialised tests: Battery, Compression, Cylinder Balance, Noise Vibration and Harshness and Prop-shaft Balancing. Please note that PicoDiagnostics only works on Windows.
Unplug your PicoScope and make sure that you start the PicoScope 7 Automotive Software and not the PicoDiagnostic Software for this course. Some PicoScope 7 images in this course show the Early Access version. Please ignore that and use the old version downloaded using the box above.
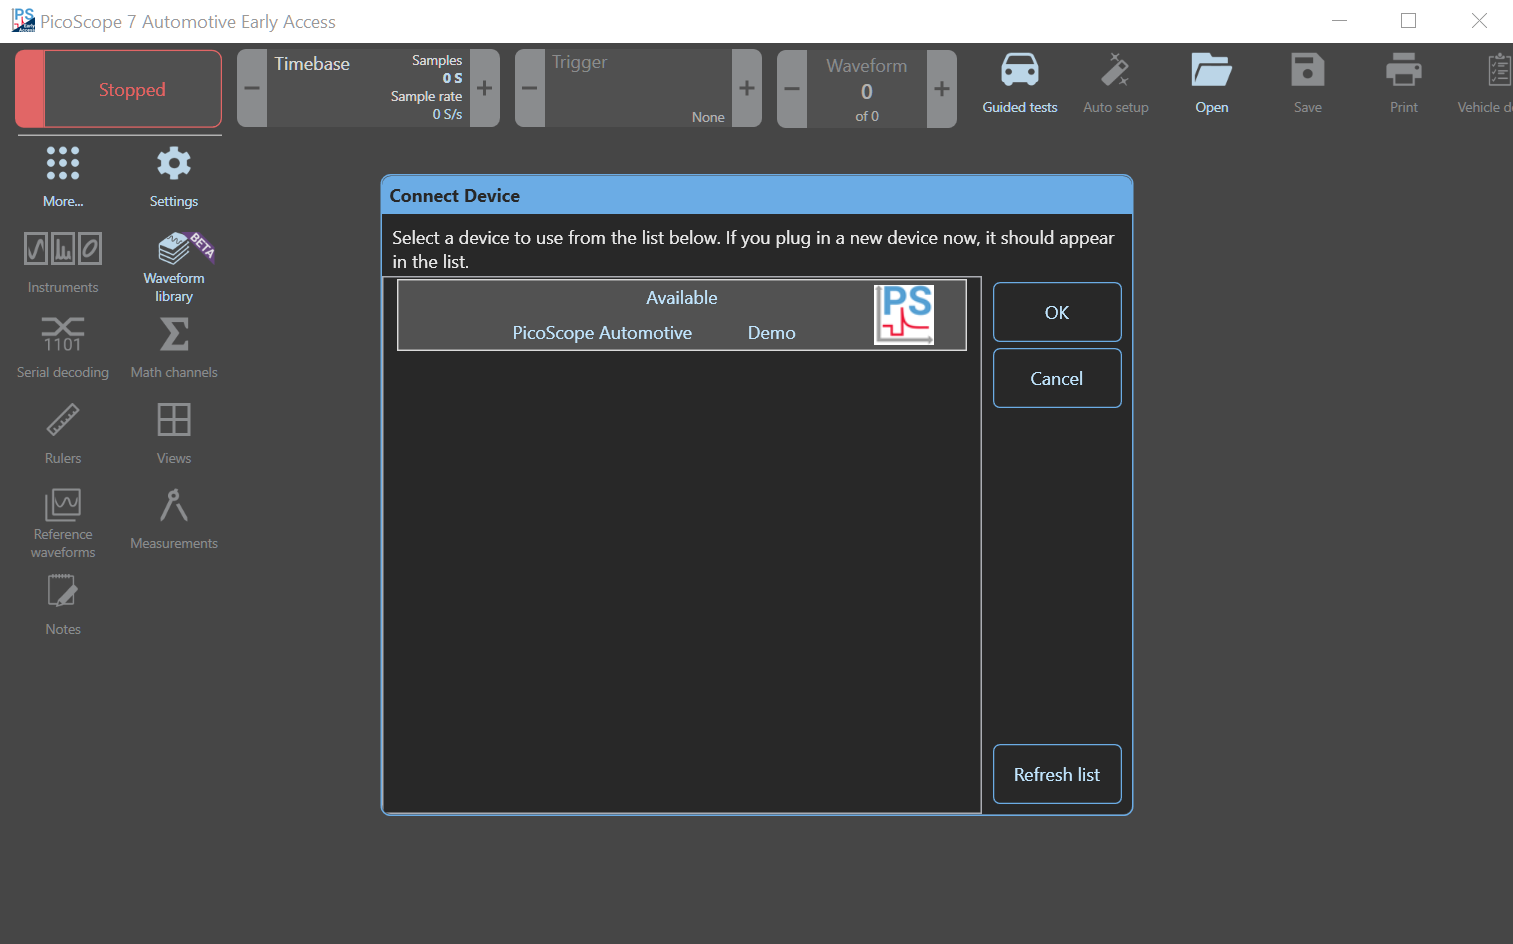
The Software will ask you to select the Demo Device or an Automotive PicoScope (if you have one). If you do have an Automotive PicoScope, and it is attached to your computer, it may start up automatically, which is why you should unplug it first.
Select the Demo Device and click OK.
Guided Tests Window
Close the Guided Tests Window.
By default, PicoScope displays the Guided Tests Menu (Automotive Testing with PicoScope) when you start. We will discuss these features elsewhere on this website but not in this tutorial, so please close that window. You can always re-open it by clicking the "Guided tests" icon at the top.
Factory Settings
Click Settings, Choose Factory Settings and then Restart PicoScope 7.
If you have just installed PicoScope 7 software for the first time or if it is already set to Factory Settings, then you can skip this step.
Alternatively, if the PicoScope 7 software has been in use before, then the settings may have changed. It may help you to reset it to factory defaults and then restart to apply them. Click the More... button and then choose Settings (you might have to scroll down to see it). If the option, 'Start-up settings', is not set to 'factory', then:
- Select 'factory', close PicoScope 7 and restart it.
- The Demo Mode settings will be reset, so select the Demo Device again
- Click OK, then close the Guided Tests Window again.
Last Session
Click Settings and Choose Last Session.
Once you have reset the software, you should change the Start-up Settings to 'Last Session' so that PicoScope 7 remembers where you were if you need to close down. We recommend that you choose this whilst doing this course.
Saving
When you use PicoScope in your workshop, you can save a number of configurations — e.g. a configuration for checking injectors, another for relative compression, etc. to allow you to quickly change to a new test setup. You can use the Save Icon at the top to save the scope setup and to save the current waveform. Once you have clicked the Save Icon, you can choose the File Type to save.
- CSV Document — Creates a Comma Separated Variables waveform document, which you can open in Excel
- PNG Image — An image of your PicoScope Screen
- PS Data File — The current data including settings, waveforms, vehicle details, etc.
- PS Settings File — Your current Settings
- Tab Delimited - Similar to a CSV waveform document except tabs instead of commas are used
- User Default Settings - Settings that you want PicoScope to use when you start up.
If you enter all the required info, you can also upload your waveform to the PicoScope Waveform Library for PicoScope to share your waveform and comments on it with PicoScope Users around the World.
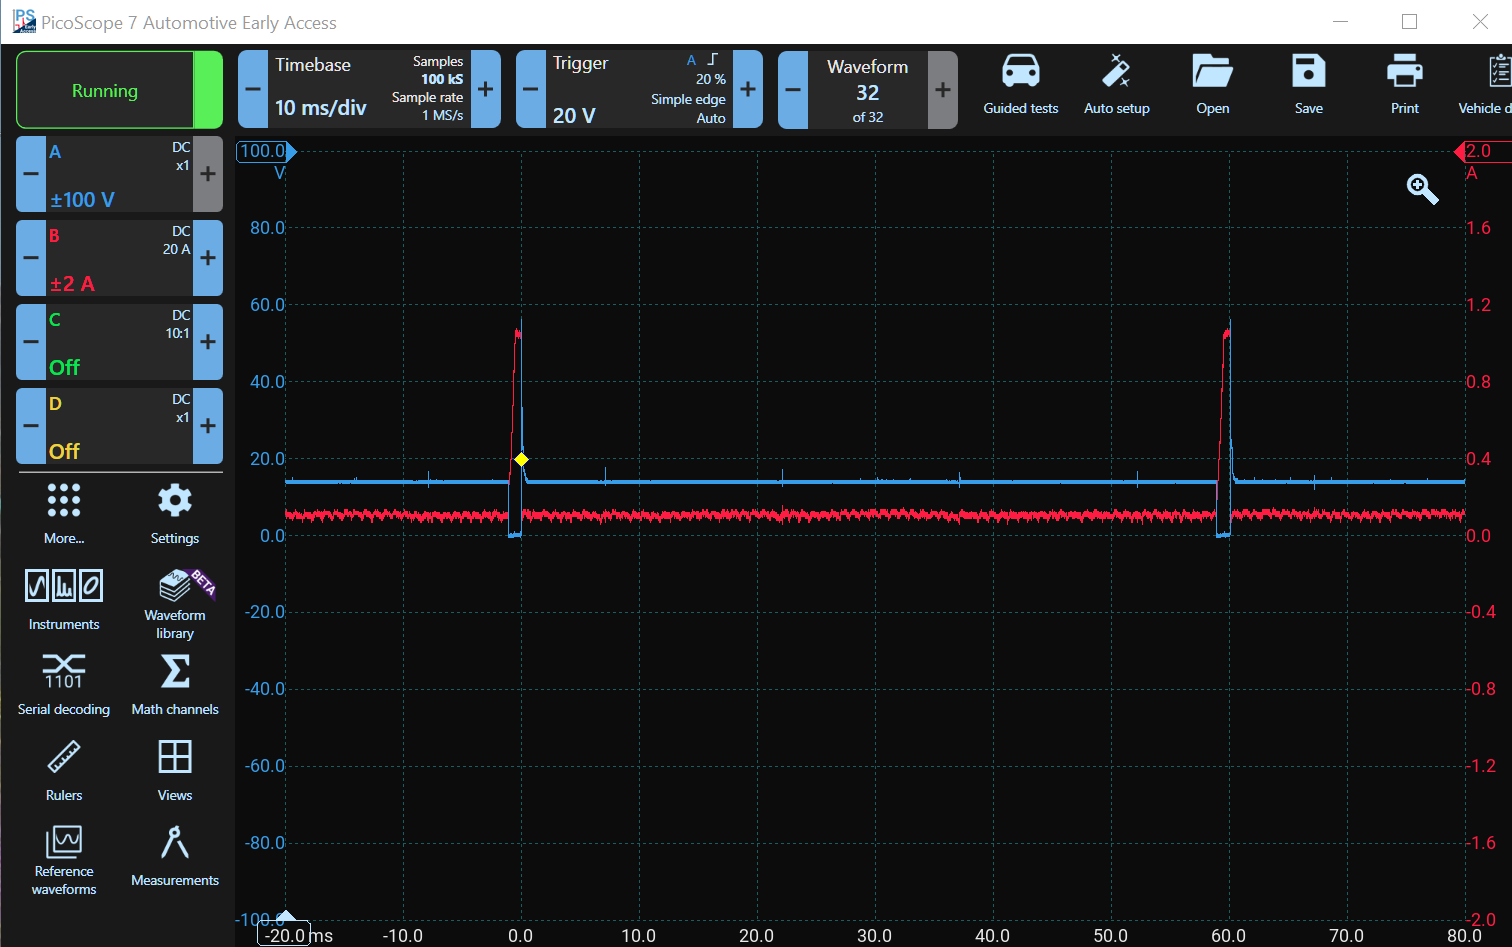
Your display should be similar to the image above, but if your display is not exactly the same, don't worry, you can change settings easily to correct it.
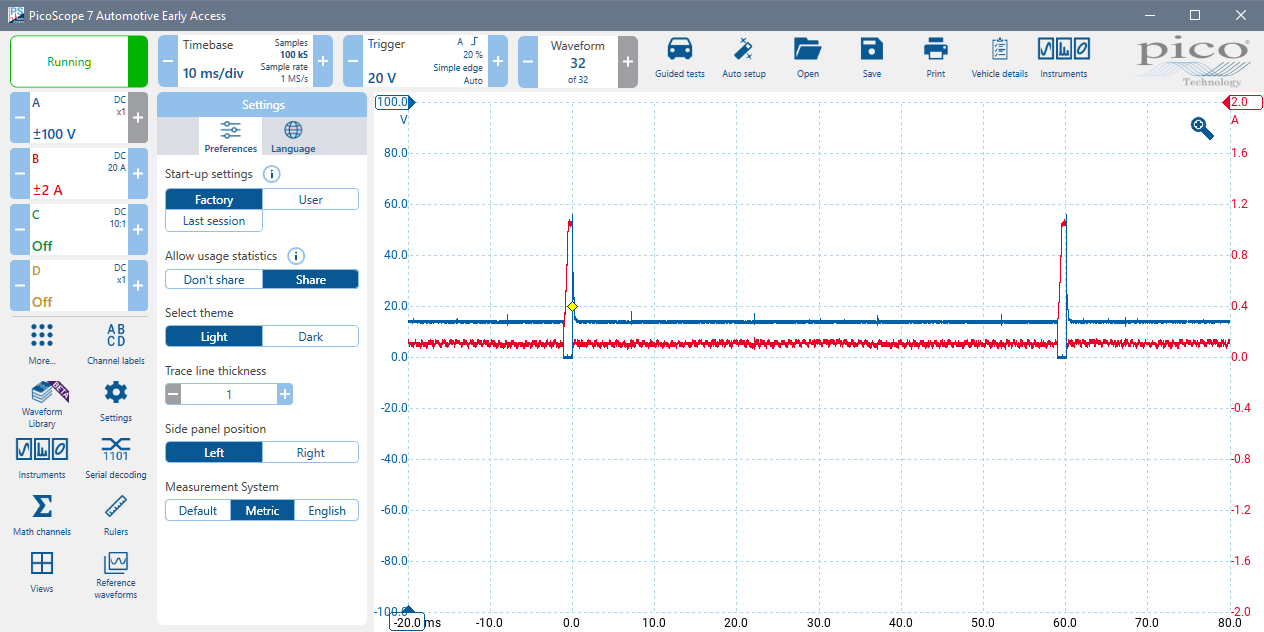
Settings, Light and Dark Mode
Click Settings, Choose Light or Dark Mode.
One of the new features is Dark Mode. Light Mode is the default. Feel free to choose Light or Dark Mode, whichever you prefer. You can select either the Dark or Light Theme in the Settings Menu Panel by clicking on the "More..." Icon (below the four channels A through D). The More Panel is displayed to the right. Find the Settings Icon. You can scroll down if you can't see it on your screen.
Accessing commonly used Controls more easily
Click More, Try clicking the stars next to the controls to move items to and from the main menu.
Click the More... icon to open the More Menu Panel and notice the star next to the icons in it. Then click on one of the stars, and it will be highlighted (filled in), and the associated icon will be displayed in the main menu (with the "More..." icon you clicked).
If you click the star again, it will be un-highlighted, and the associated icon will be removed from the main menu panel, but it will still be available in the More Menu Panel. Move features you use most often to the Main Menu Panel.
Moving the Side Panel Left and Right
Click Settings, Try moving the panel left and right.
Click on the Settings Icon and you can set up PicoScope. The settings panel appears again. You can now move the side panels to the right.
If you click outside the Settings Panel, e.g. on the display area, the panel will disappear. That is the easiest method to regain the screen space used by any open panel.
Running and Stopped Button
Click the Running / Stopped Button and try using the Space Bar to control the Scope.
Notice at the top left of the screen, above the channels, there is a button which is green when the PicoScope is running and red when the PicoScope has stopped. You can stop and start the scope whenever you like by clicking this button. If, whilst you are experimenting, the scope doesn't seem to run properly, you can try stopping and starting using this button. You can also use the space bar to stop and start when the PicoScope 7 window is selected.
Maximise the Waveform Display Area
Use F11 to toggle Full-Screen Mode for the Waveform Area.
Often it helps to remove all menus and other distractions so that you can focus on the waveform. Use the F11 key to maximise the waveform display to fill the entire monitor. Use F11 again to restore.