


Top-10 Tests: Test 5 Lambda Sensor (Oxygen or EGO)
Test 5: Lambda Sensor (EGO)
The purpose of this test is to evaluate the operation of a zirconia type exhaust gas oxygen sensor (lambda sensor) during running conditions, by monitoring its output voltage and response time.
How the Lambda Sensor Works
The lambda sensor, invented by Bosch, measures the amount of oxygen O2 in the exhaust gas. If oxygen is detected, then the mixture is lean. If none is found, then the combustion is at stoichiometry (all fuel and air are consumed during combustion — approximately 14.7:1 air fuel ratio by mass) or rich.
- Rich means that there is more fuel in the mixture than required.
- Lean means that there is more oxygen in the mixture than required.
- Stoichiometry means that there is exactly enough oxygen in the mixture to burn all the fuel in the mixture.
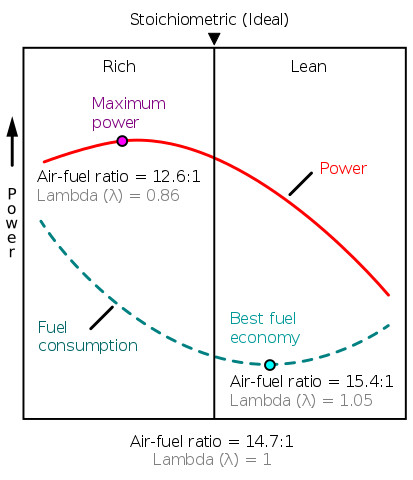
The ECU will progressively enrich the mixture if oxygen is detected and progressively lean the mixture if none is detected. That keeps the mixture near to stoichiometry and accounts for the alternating waveform produced in this test. This is called 'closed loop mode' where the engine management feeds back the level of oxygen and uses this information to set the air-fuel mixture.
Types of Lambda Sensors
There are two types of lambda sensors, a wideband and a narrowband. Both need to be up to temperature to work. Different materials can be used (zirconia or titania) which produce different output waveforms. Most lambda sensors have a built-in heater so that the time spent in open-loop mode is minimised to reduce emissions.
Narrowband vs Wideband Sensors
The narrowband sensor acts almost like a switch that changes state as soon as oxygen is detected. The wideband sensor (e.g. Bosch LSU 4.2 and LSU 4.9) has a more gentle characteristic and can show how much oxygen is in the exhaust stream. Two or more lambda sensors may be installed, one at the exhaust manifold (upstream) and the other, after the catalytic converter (downstream).
Effect of changes to the air fuel mixture
Fuel economy is improved with a slightly lean mixture; conversely, engine power improves with a slightly rich mixture. The engine tends to run hotter when the mixture is lean. Emissions are reduced at stoichiometry.
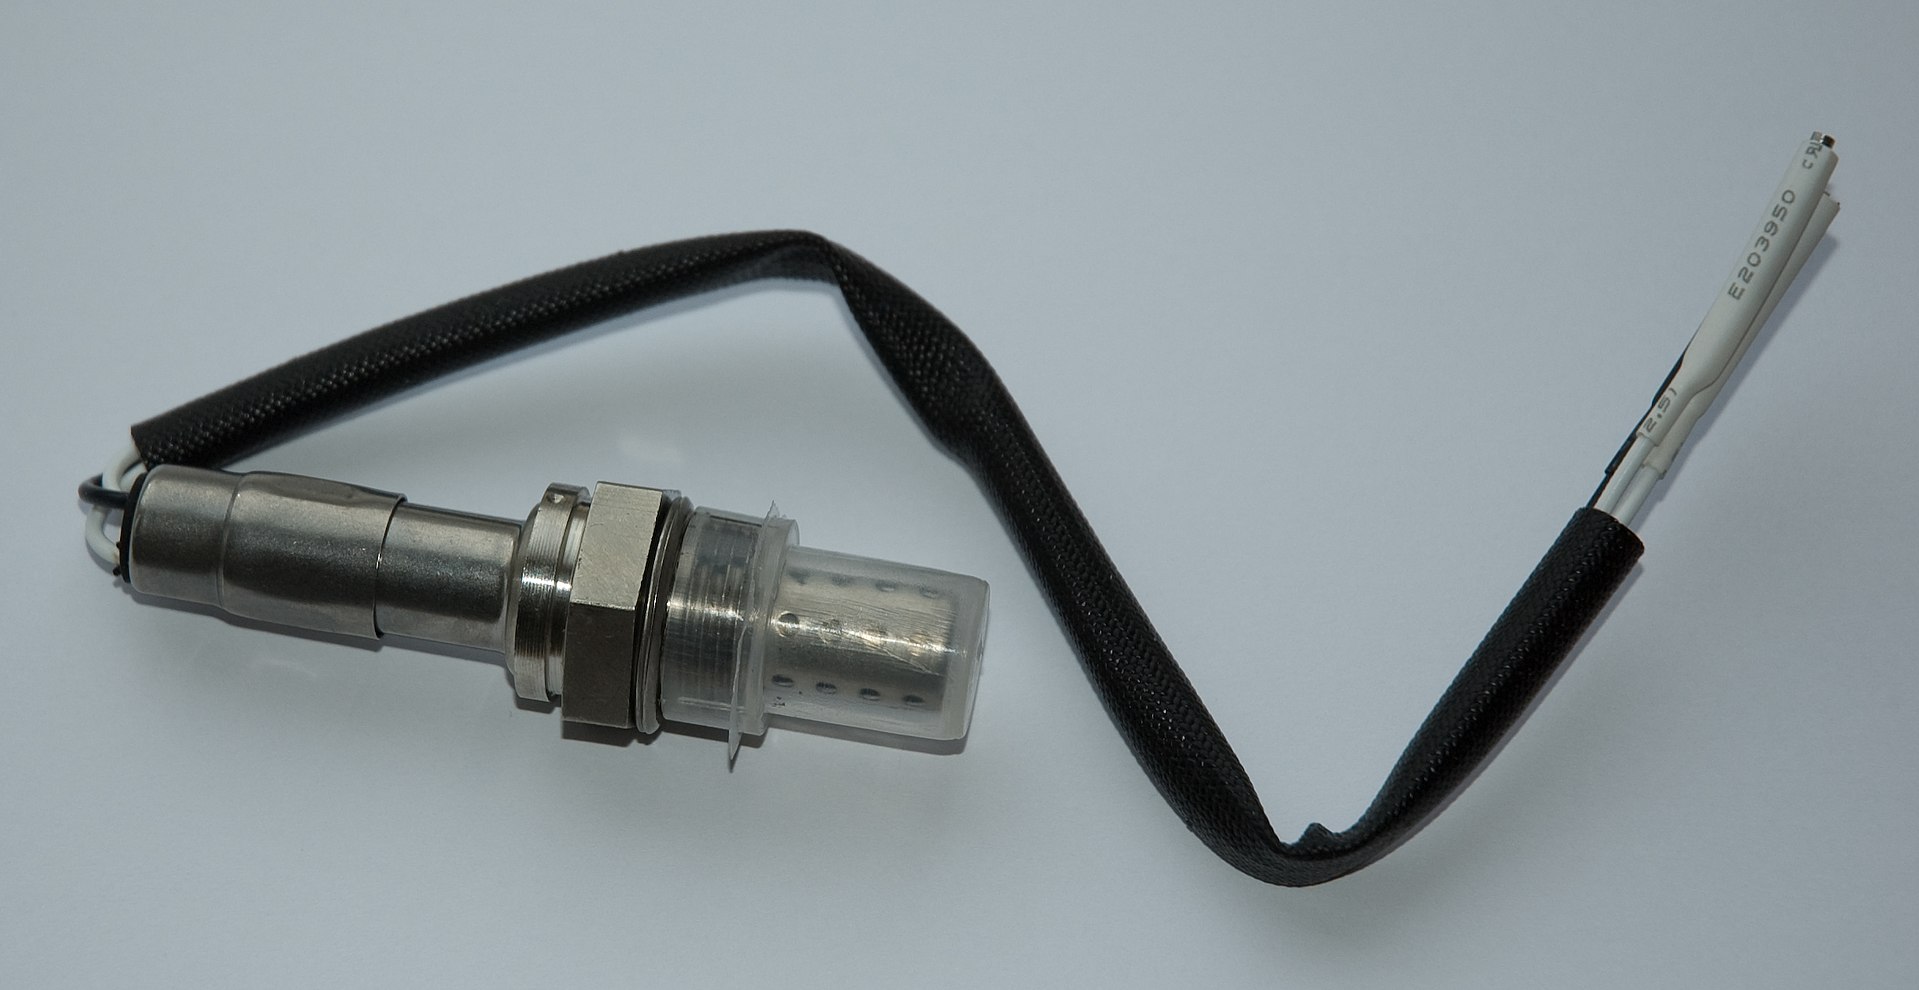
Oxygen Sensor Zirconia Test
- Use the Manufacturer's Data to identify sensor signal connections;
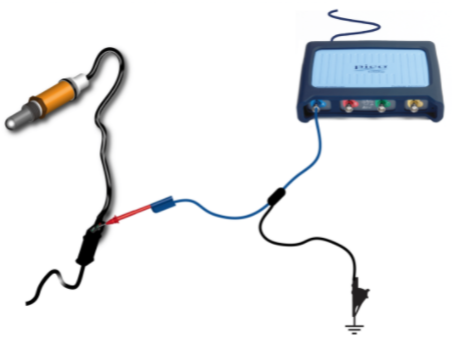
- Connect PicoScope Channel A to the sensor output;
- Use the Guided Test to set up the PicoScope:
- Click on Guided Tests to open the Guided Tests Window;
- Click on the Red Sensor Icon;
- Choose Oxygen from the Sensors List;
- Choose 'Oxygen (zirconia) Output';
- Click the Guide and Settings Button;
- The PicoScope will be setup for the test;
- Comprehensive instructions and background information will be displayed.
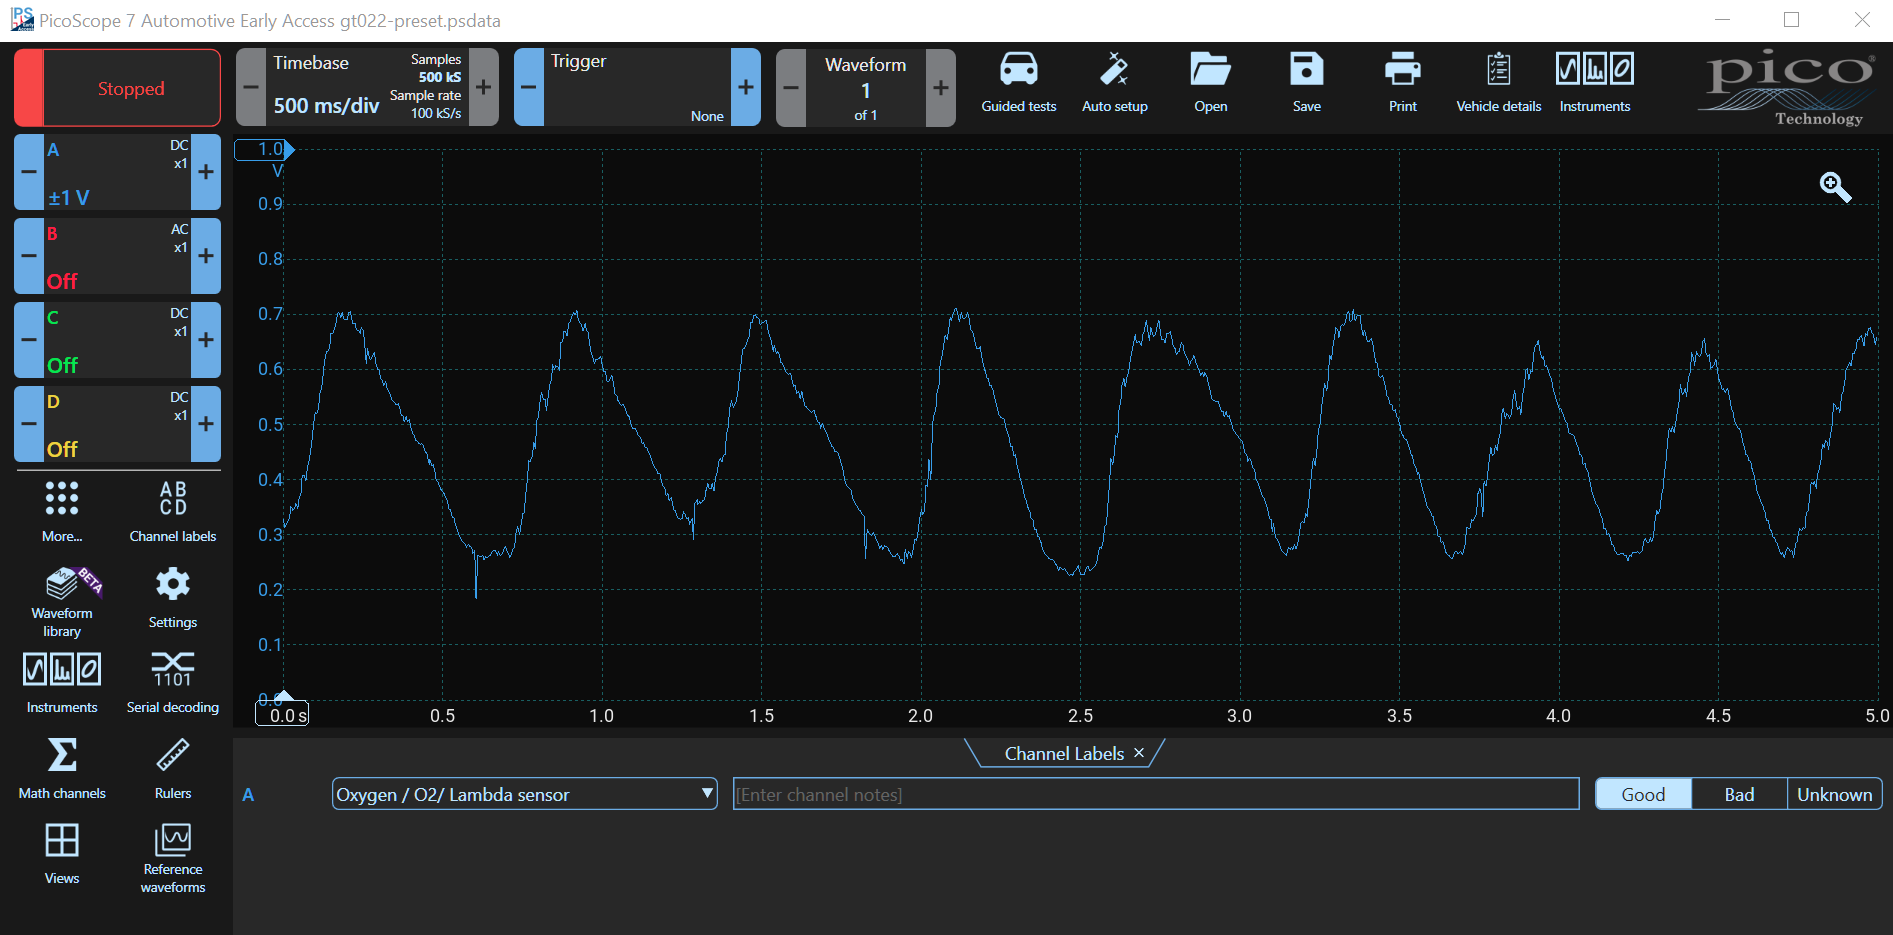
- Allow the engine to run at idle speed until normal operating temperature is reached;
- Start the scope to see live data;
- With your waveform on the screen, stop the scope;
- Use the Waveform Buffer, Zoom and Measurements Tools to examine your waveform.
Waveform Notes
Remember that the Lambda Sensor only starts working properly when both the engine and the sensor are at normal operating temperature. The sensor needs to be at or above about 180°C.
The waveform should be a cyclic voltage varying between about 250 mV and 800 mV. The frequency should be around ½ Hz to 5 Hz depending on the particular vehicle's response time. The waveform should be relatively uniform without any drop-outs or anomalies.
The Lambda Sensor may not work well at idle as the amount of exhaust gas may be too low. Increase the revs to around 2000 rpm to solve this problem.
Remember that you can use the waveform library to download known good waveforms for comparison.
Lambda Test Filtering and Ground
The following video shows how using an appropriate ground and applying filtering can improve the quality of the waveform. Notice how the Lambda switching action only starts after a delay, once the engine and sensor have warmed up.